I am using the images shot for Exercise Workflow 2 for this exercise, shot at the Coorong. I started with 226 images which all cover the same location. Within this set there are a number of sequences of images exploring the same subject, trying to improve, as recommended in the course notes. I downloaded the images to my computer using a card reader. These were placed in folders:
JPG files : Photos/DPP_1/Part_1_Workflow/Workflow_2_Editing/
RAW files: Photos/DPP_1/Part_1_Workflow/Workflow_2_Editing/cr2
At this stage of my learning process, I work mainly with out-of-camera JPGs.
Step one - the technical edit
A folder was placed in Workflow_2_Editing called /delete.
I star all images 1 star, and then go through assigning zero star rating to all images I don't like, for example, camera shake, obvious massive under/over exposure, repeat images that are the poorer version, etc etc. This is of course quite a personal process and very subjective. I do this with DigiKam software, with the setting at full-screen to maximise the viewing area of the images.
All zero star images are placed in the /delete folder (and corresponding RAW files). These are reviewed at a later review session and then deleted once I'm happy with my choices. This saves on disk space and makes viewing of the better images thus more enjoyable.
At this point I also tagged all my images, though I'm still a little unsure of how best to do this.
Step two - the selects
This left 157 images with one or more stars, all technically OK, example below.
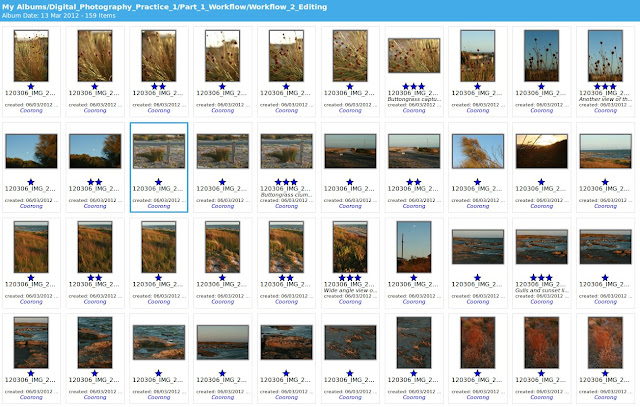 |
| Example of images with one or more stars, the result of the technical edit. |
Again at full-screen setting, I review the images and apply various star ratings:
0 star = move to /delete folder
1 star = low potential
2 star = moderate potential
3 star = good potential
4 star = definite best images to edit
At this stage I just used 1, 2 or 3 stars.
Step three - the first selects
At this point of the process I had 11 images with 3 stars. These are my first selects (displayed below) and I made a brief note in the 'comments' box to explain why I liked each image.
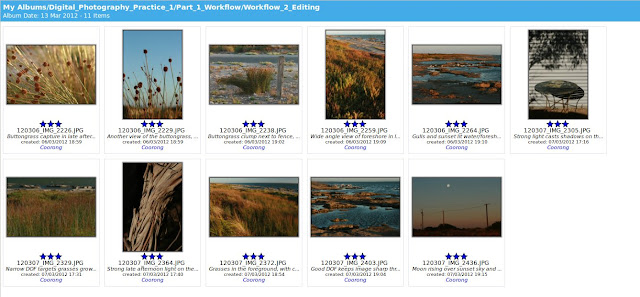 |
| 11 images with 3 stars. Comments added to each image. |
Step four - group and review
I stopped working and came back later, and reviewed all my choices. I was happy and did not make changes to my first selects this time.
Step five - a final choice
I then displayed just my first selects and went through to choose my final two images to process and present. I did this by viewing in full screen mode and simply choosing those two images I liked the best, and gave them both four stars.
The first image I chose because I liked the strong shadows, simple setting and the 'country' feel the image has. The colours are muted and simple, and I felt like the whole image just worked.
The second image I chose because I wanted a view of the actual coorong water and decided I liked the texture of the grasses in the foreground. The DOF (from using f/22 with a 24mm focal length) is large enough to capture most (all?) of the image in focus which is important for landscape images like this one. The colours are strong, and vary across the image, with the shadows, and obviously show the time is late in the day. More birdlife on the water in this image would have added to it, but I felt overall it was a stronger image than the others in my set.
Post-processing of final choice images
My workflow from here was to take the two images into Photoshop CS2 and edit them there. I followed roughly the same sequence for both, detailed below:
1. Open .jpg file in Photoshop
2. Change resolution (300 ppi), and size (to 18 x 12 inches)
3. Save as new file, in tiff format, and with extension _18x12_001.tif
4. Create a copy of the background layer
5. Check colour balance and adjust if necessary (not required for these two images)
6. Apply levels/curves as layers to whole image, when using levels use the 'alt' key to see impact. Adjust opacity to curves to decrease impact.
7. Localised editing. In this case, Image 1 did not require any - the dirt is real and on the wall, and thus was not removed. For Image 2, I did some spot healing and cloning for minor marks in the sky, possibly dust spots that have been hard to remove on the sensor (which I cleaned prior to my holiday). I zoom right in to 100% for this process, and also make sure I zoom right out to view the whole image to make sure any retouching is subtle and not seen in the final image.
8. Crop as necessary. In this case, only Image 1 was cropped a little to slightly reduce the dark shadow area at the bottom of the image.
9. Unsharp mask
10. Save as both a tif file (to keep layers) and jpg file (flattened).
I am in the process of learning about Photoshop at the moment, both through an evening course and also reading 'Evening, M, 2005, Adobe Photoshop CS2 for Photographers, Focal Press, Oxford', so my workflow will hopefully develop as I learn more.
The final two images are displayed below.
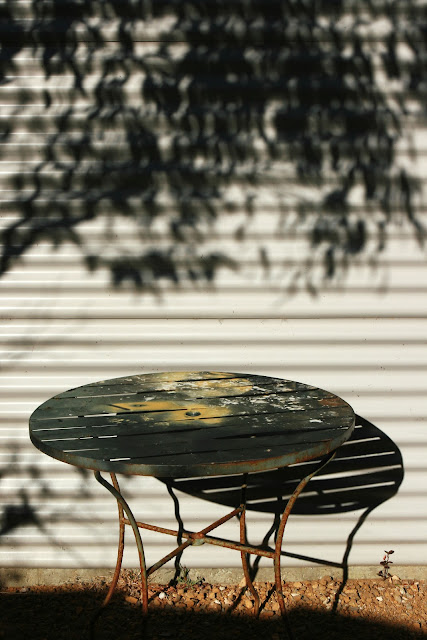 |
| Table against wall |
 |
| Coorong; Grasses and water at sunset |
My notes in my logbook are presented below:
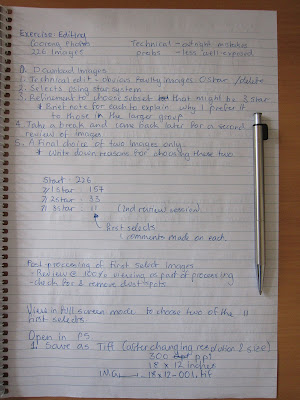 |
| Logbook Notes, Editing |
 |
| Logbook Notes, Editing |
In conclusion, I already had some kind of editing process, but it was good to formalise it through this exercise. I will continue to use this system in future projects. I want to learn more about tagging images (keywords etc), which I will try to do some reading on. I will also continue my reading and learning more about post-processing which is an important part of the modern digital workflow.


